Backup Approach
The easiest way to accomplish this is by using the backup feature in TouchDraw 1. It can create a Zip file containg all of your drawings and libraries, which can then be uzipped into the TouchDraw directory in your iCloud Files or in your local iPad storage.
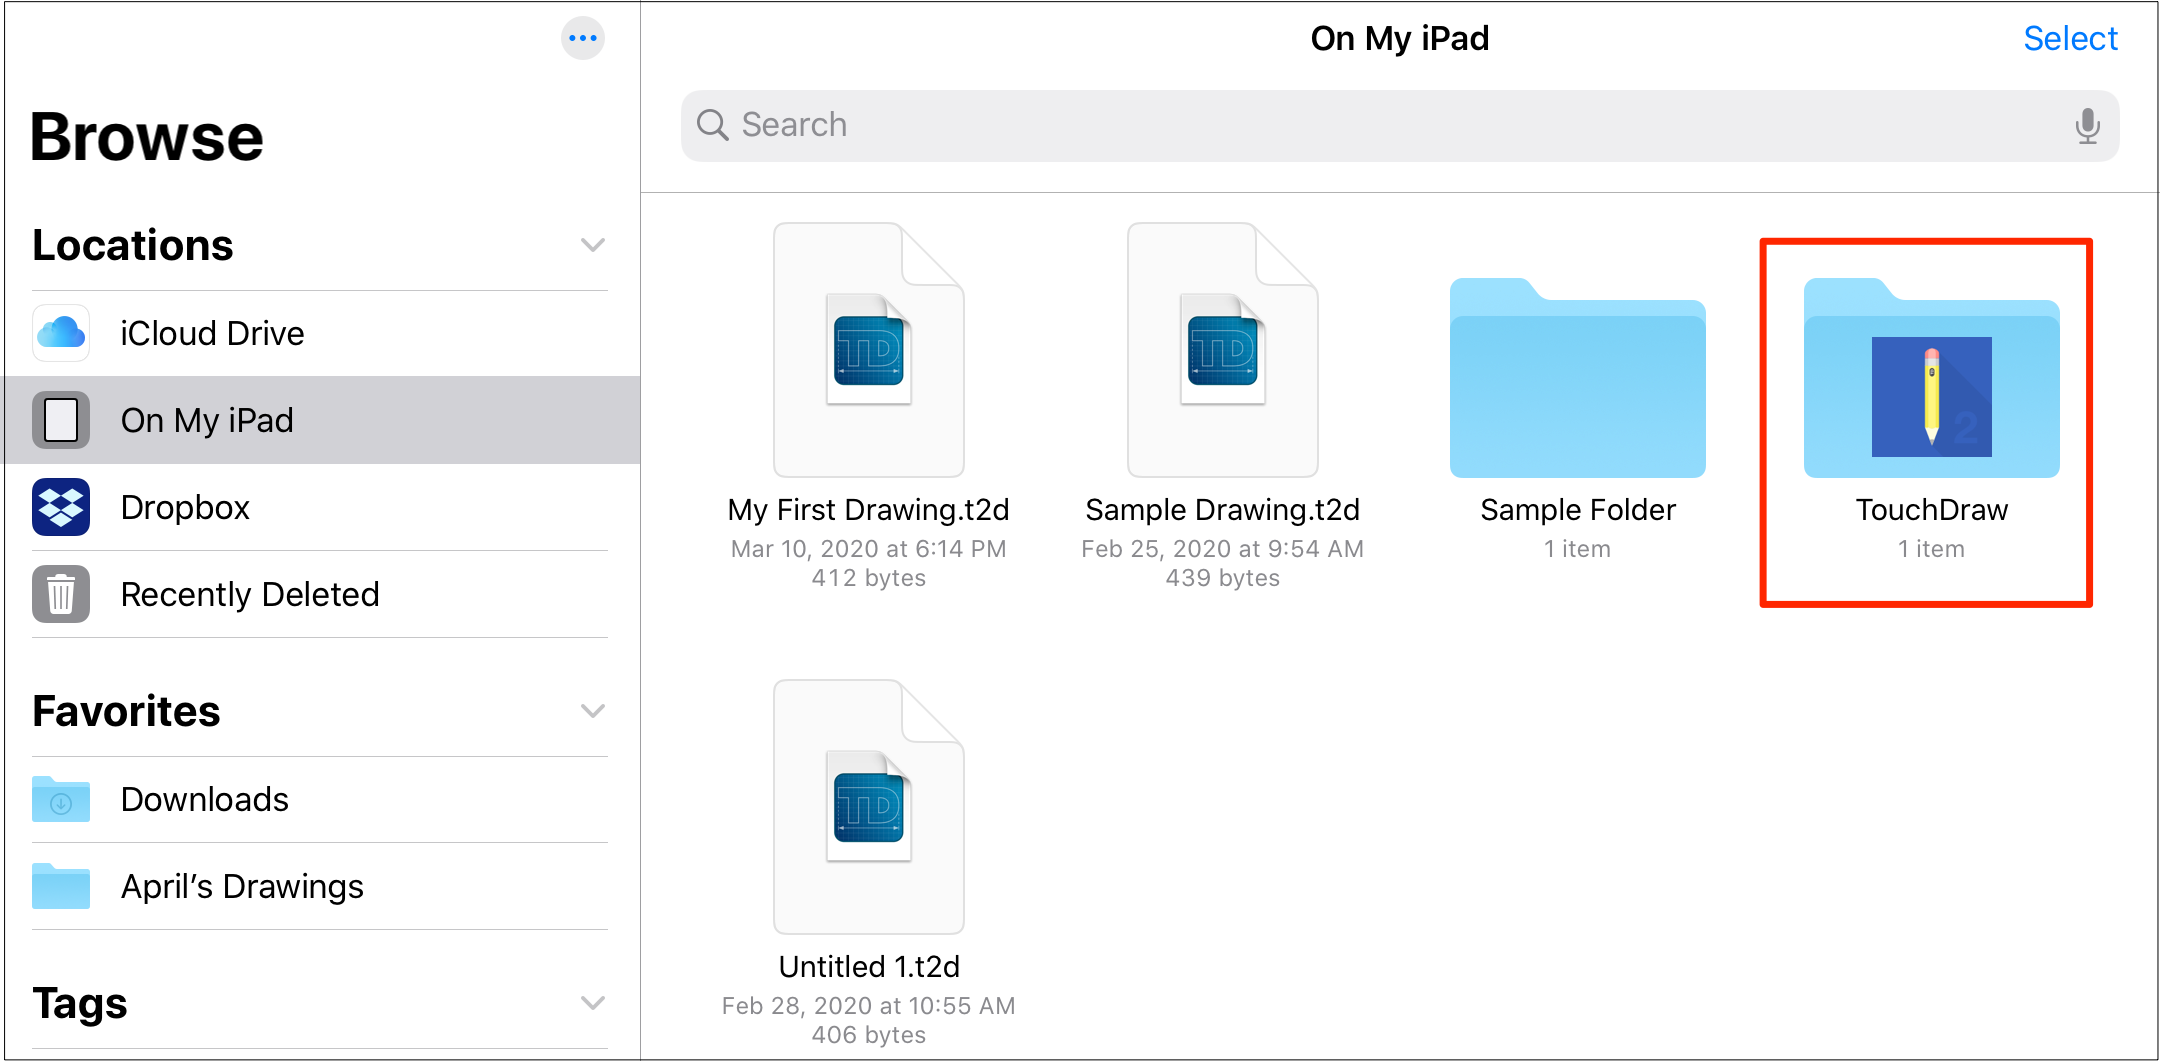
Step 1: Make sure you have run TouchDraw 2 at least once on your device. A TouchDraw folder will be created on your iPad or on iCloud the first time the app is run.
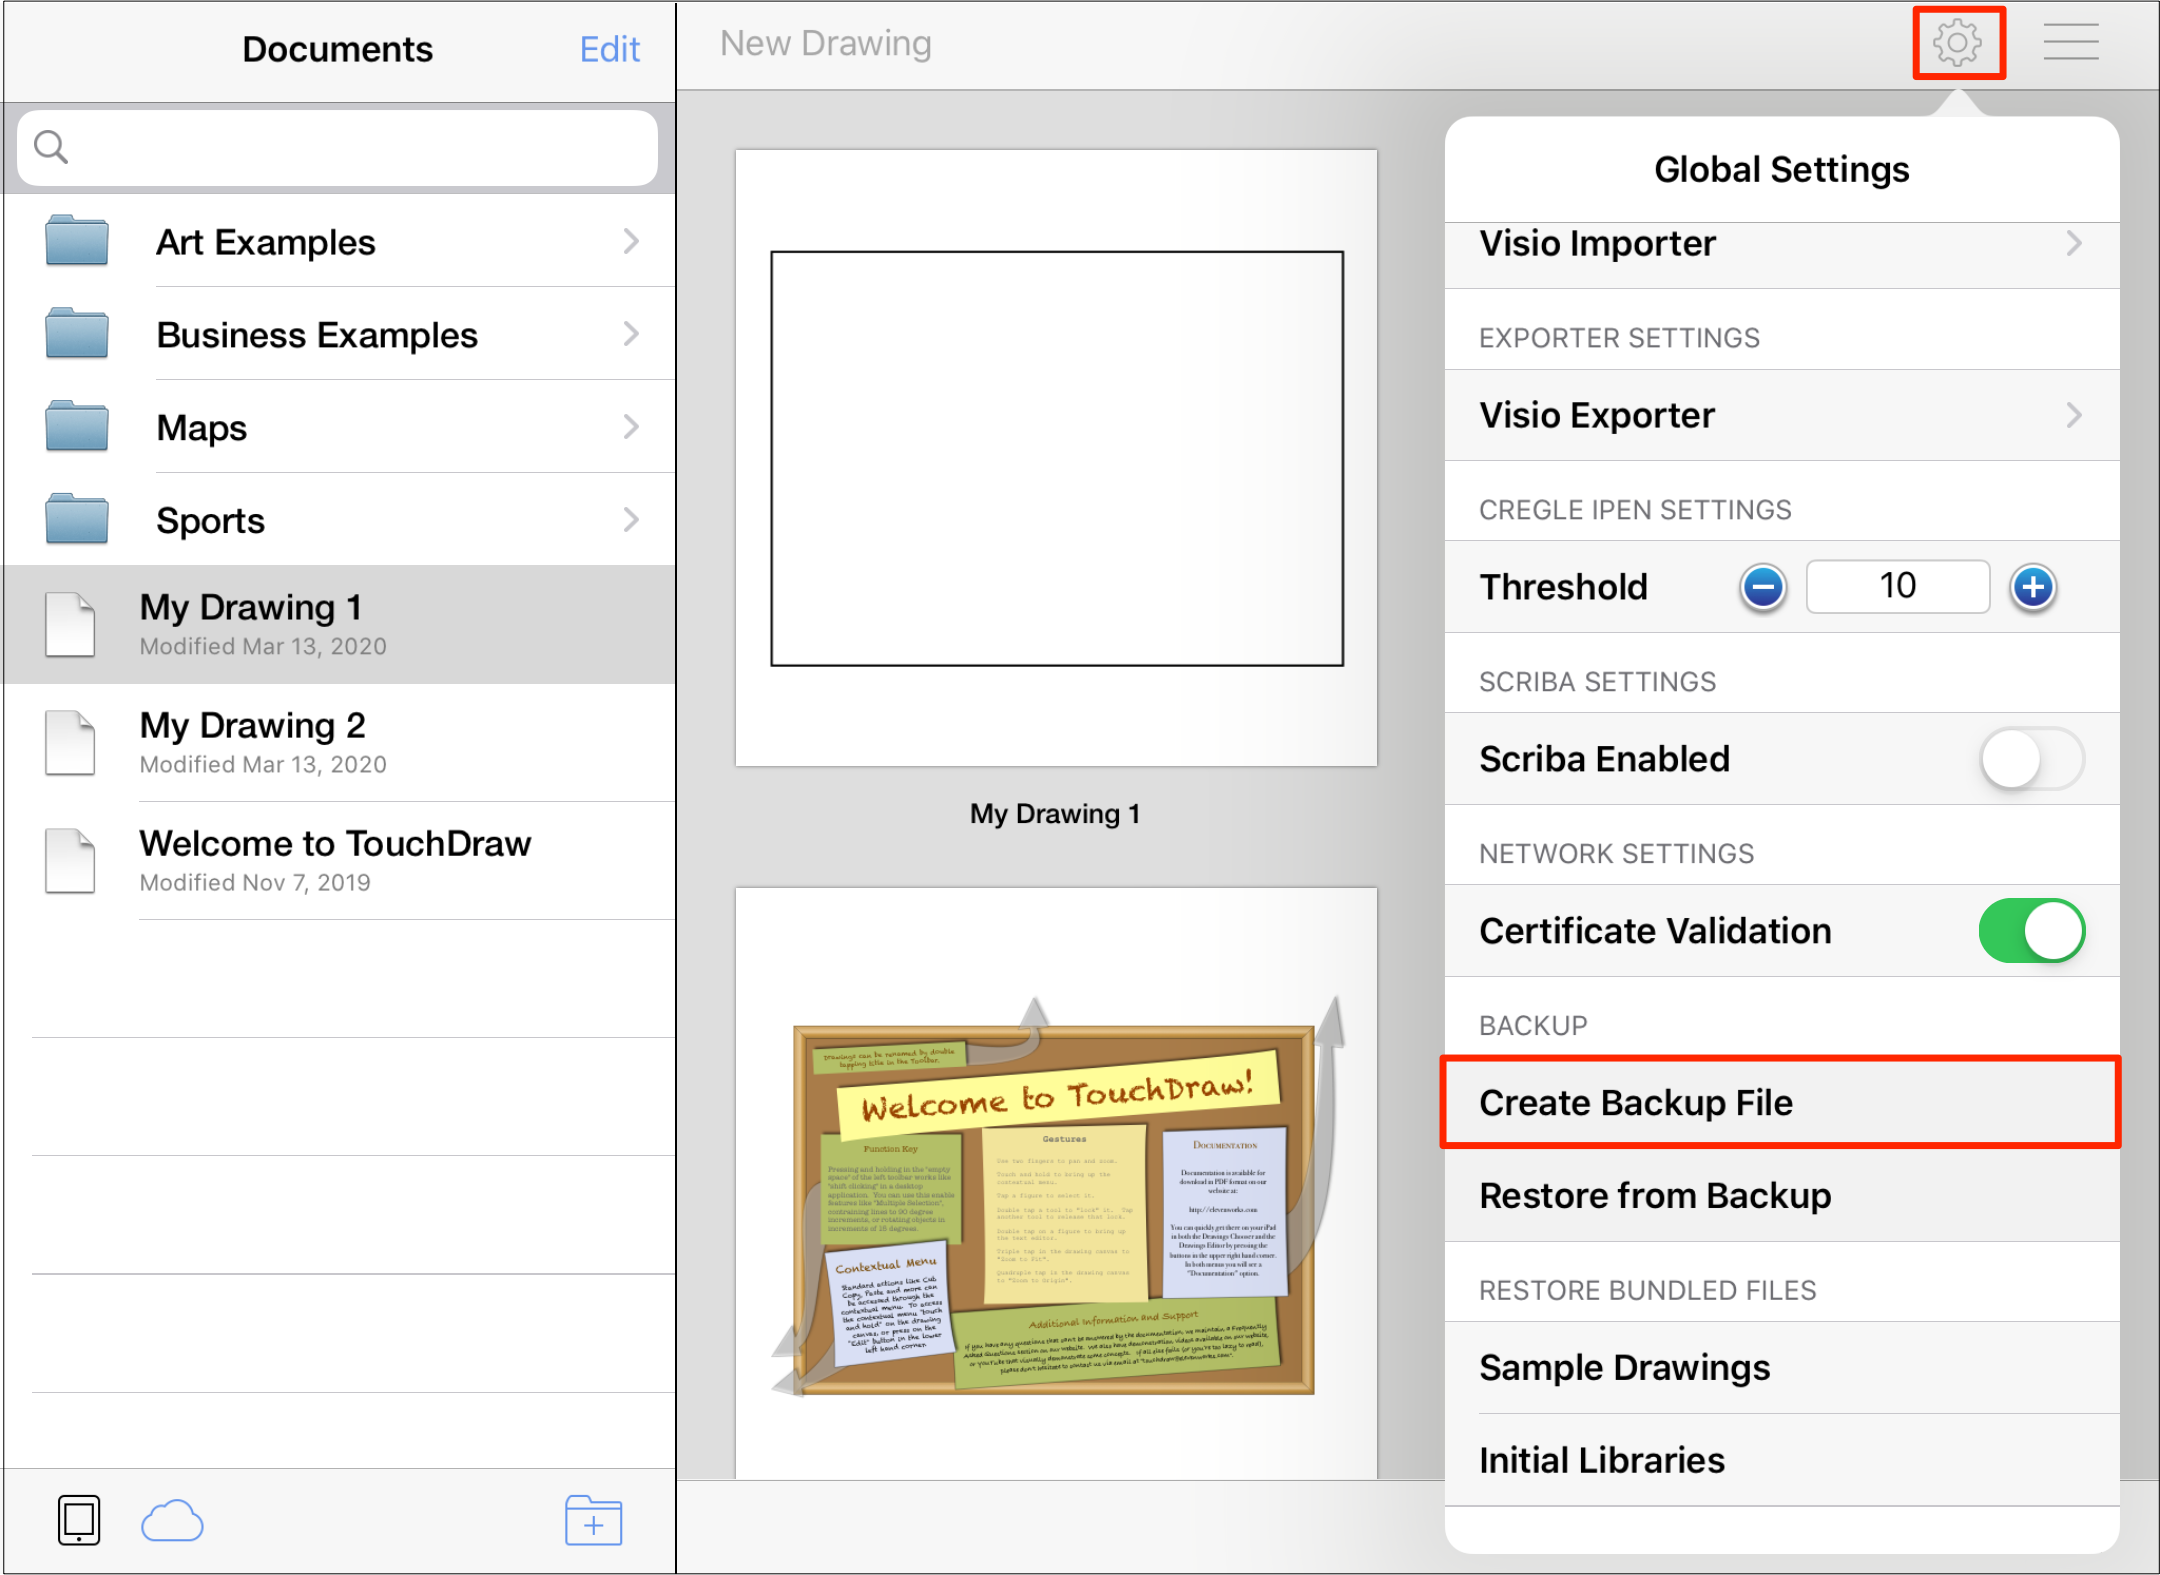
Step 2: Open TouchDraw 1 on your iPad. Press on the Global Settings Button and tap on the Create Backup File option. This option will create a backup file containing all of your TouchDraw 1 drawings and libraries.
Step 3: Tap on the Save to Files option.

Step 4: Select the TouchDraw folder within iCloud, the TouchDraw folder in local file system or another location of your choice and tap Save. This will save the Zip file with all of your drawings and libraries in that location.

Step 5: Next, open the Files app on your iPad.

Step 6: Press on the TouchDraw folder (or the alternate location you selected in Step 4) to access the created backup file.
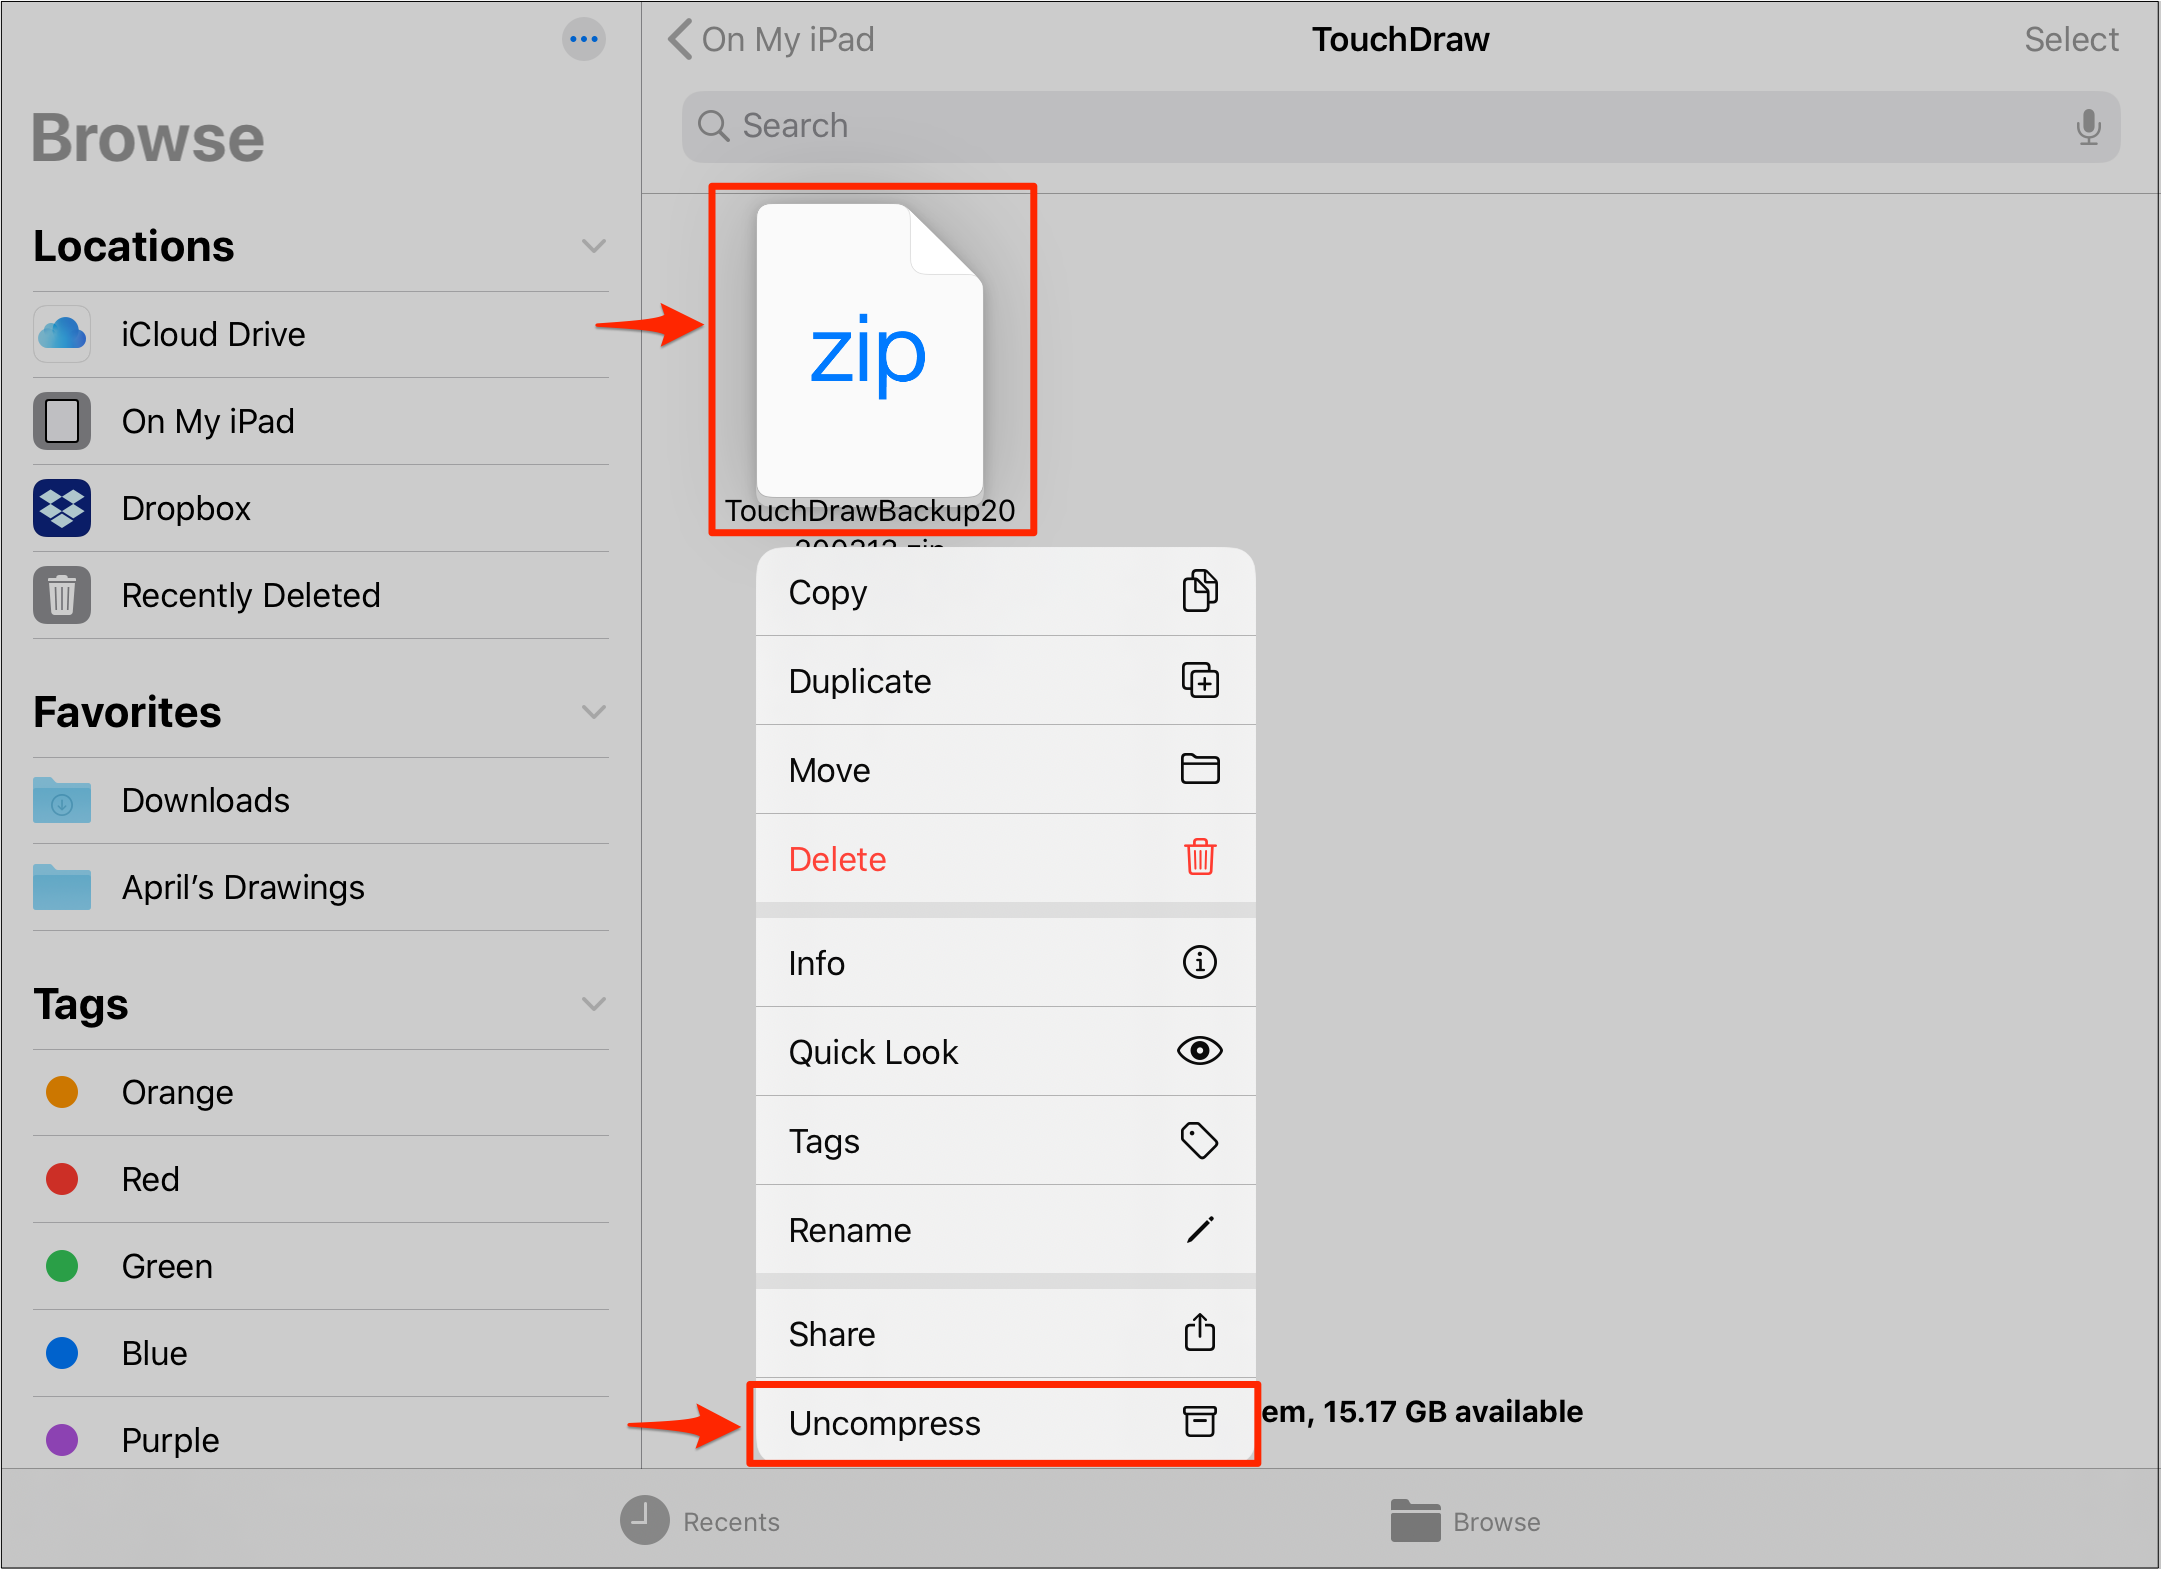
Step 7: Perform an extended Press on the Zip file to open the Contextual Menu. Then tap on the Uncompress option.
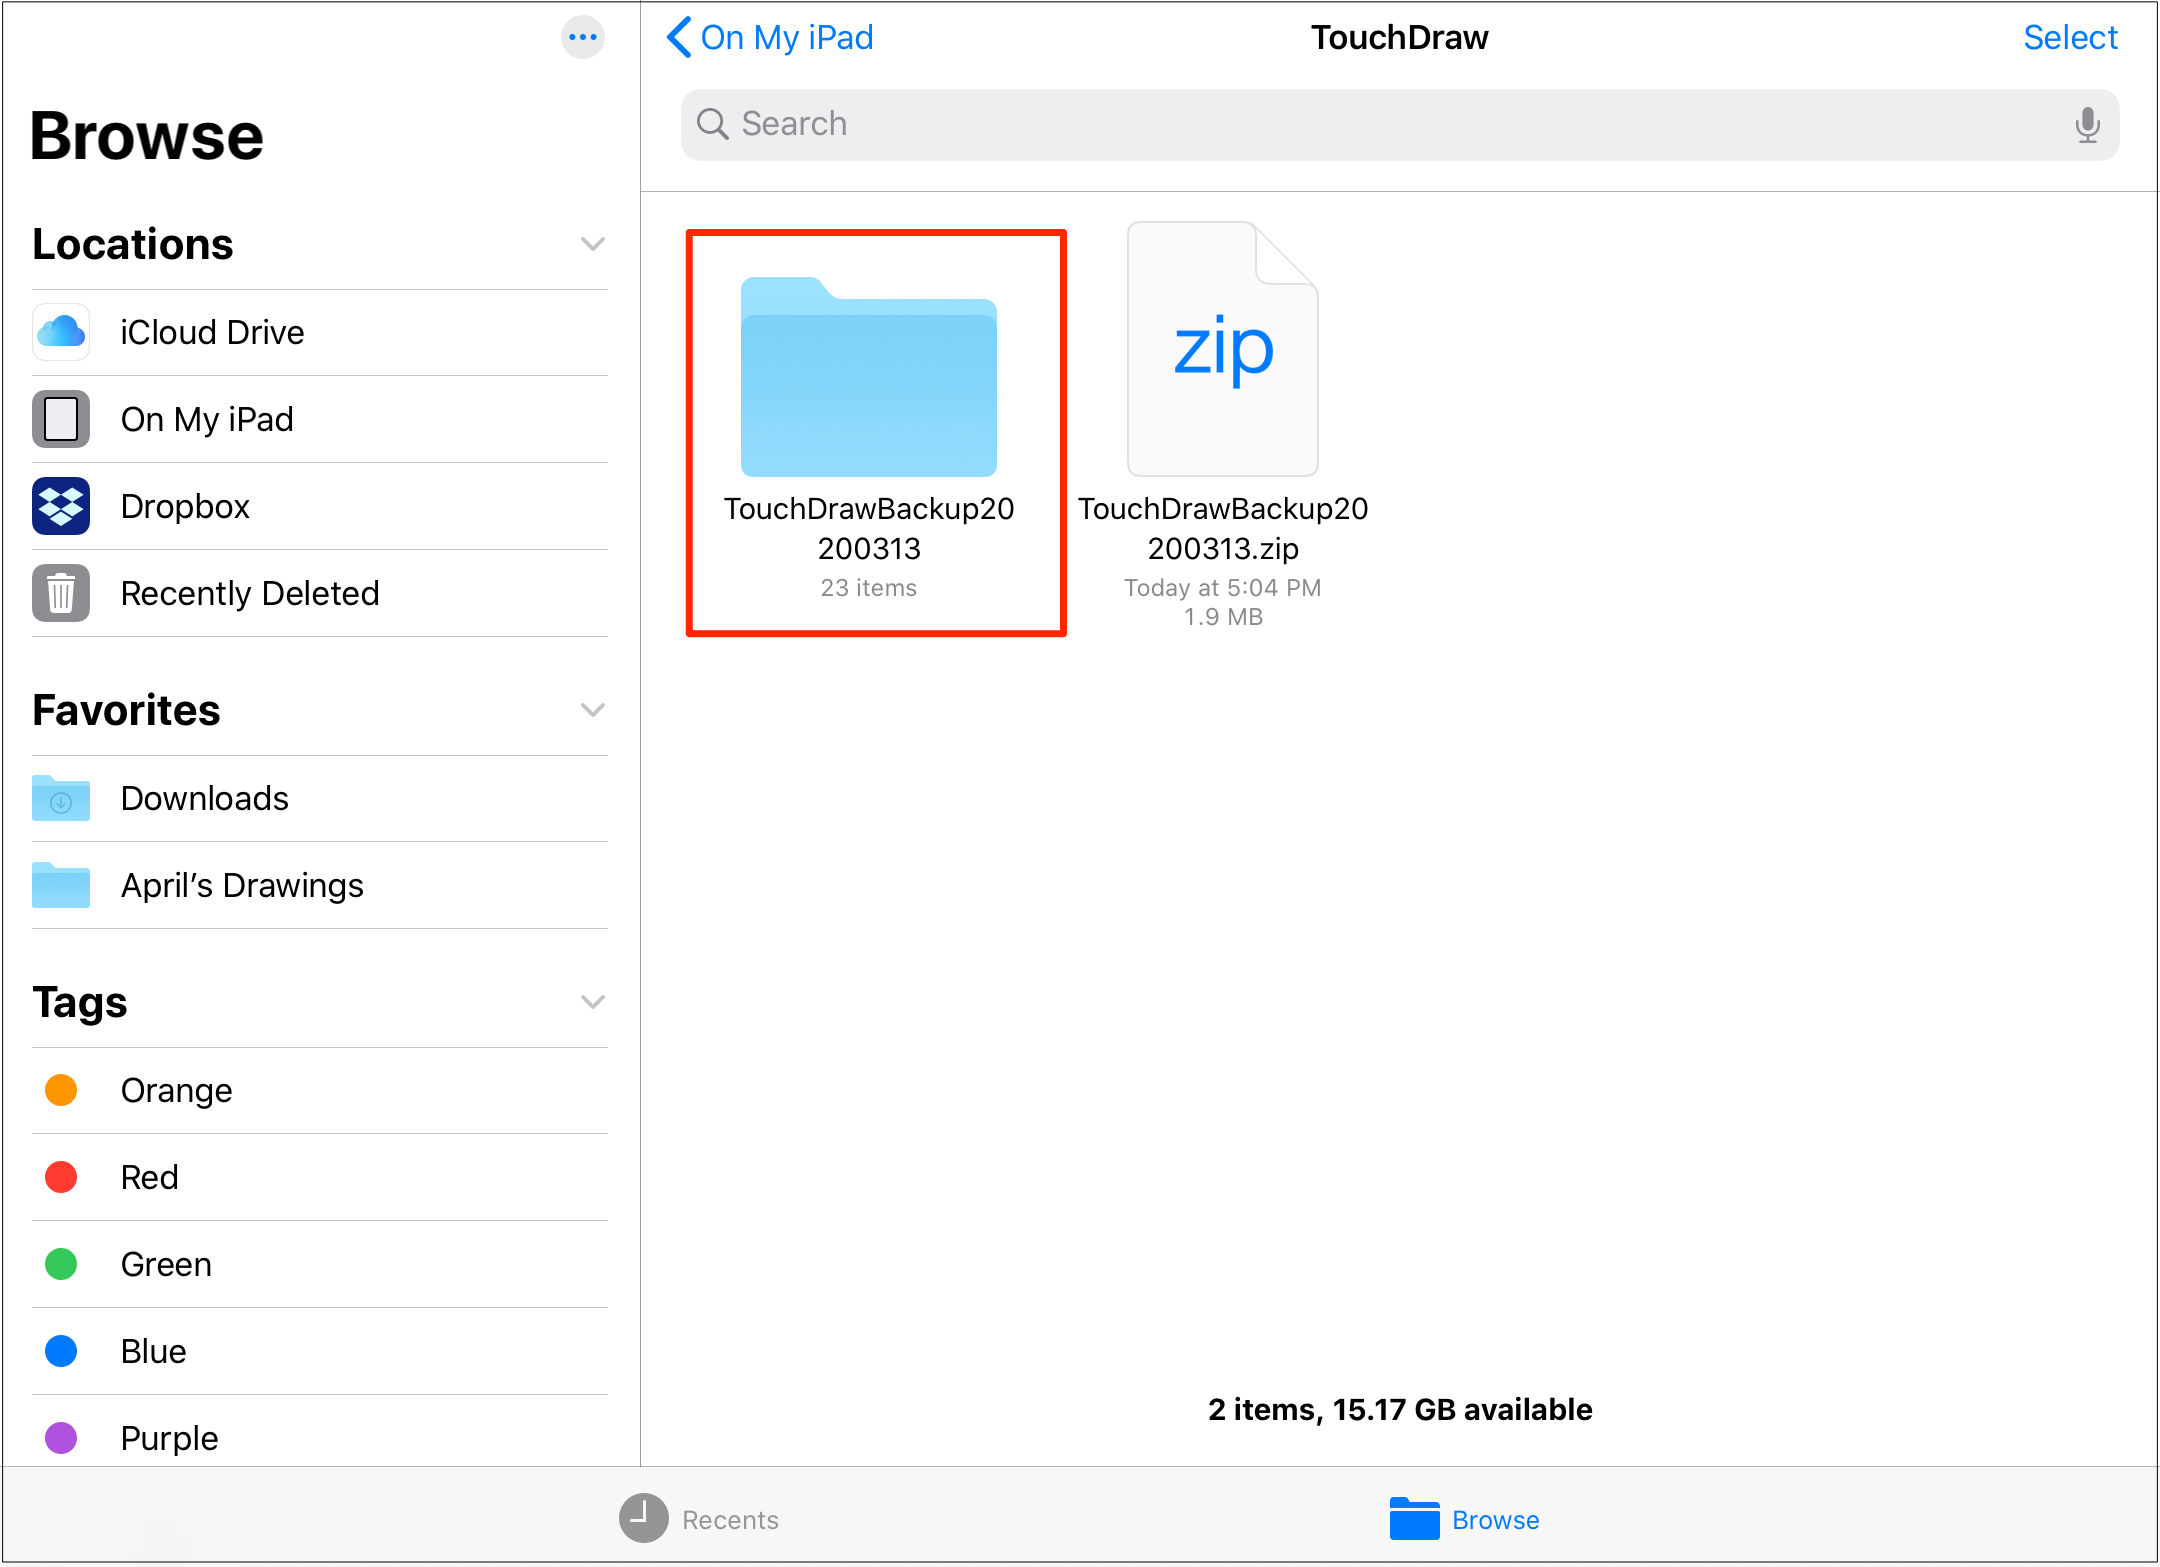
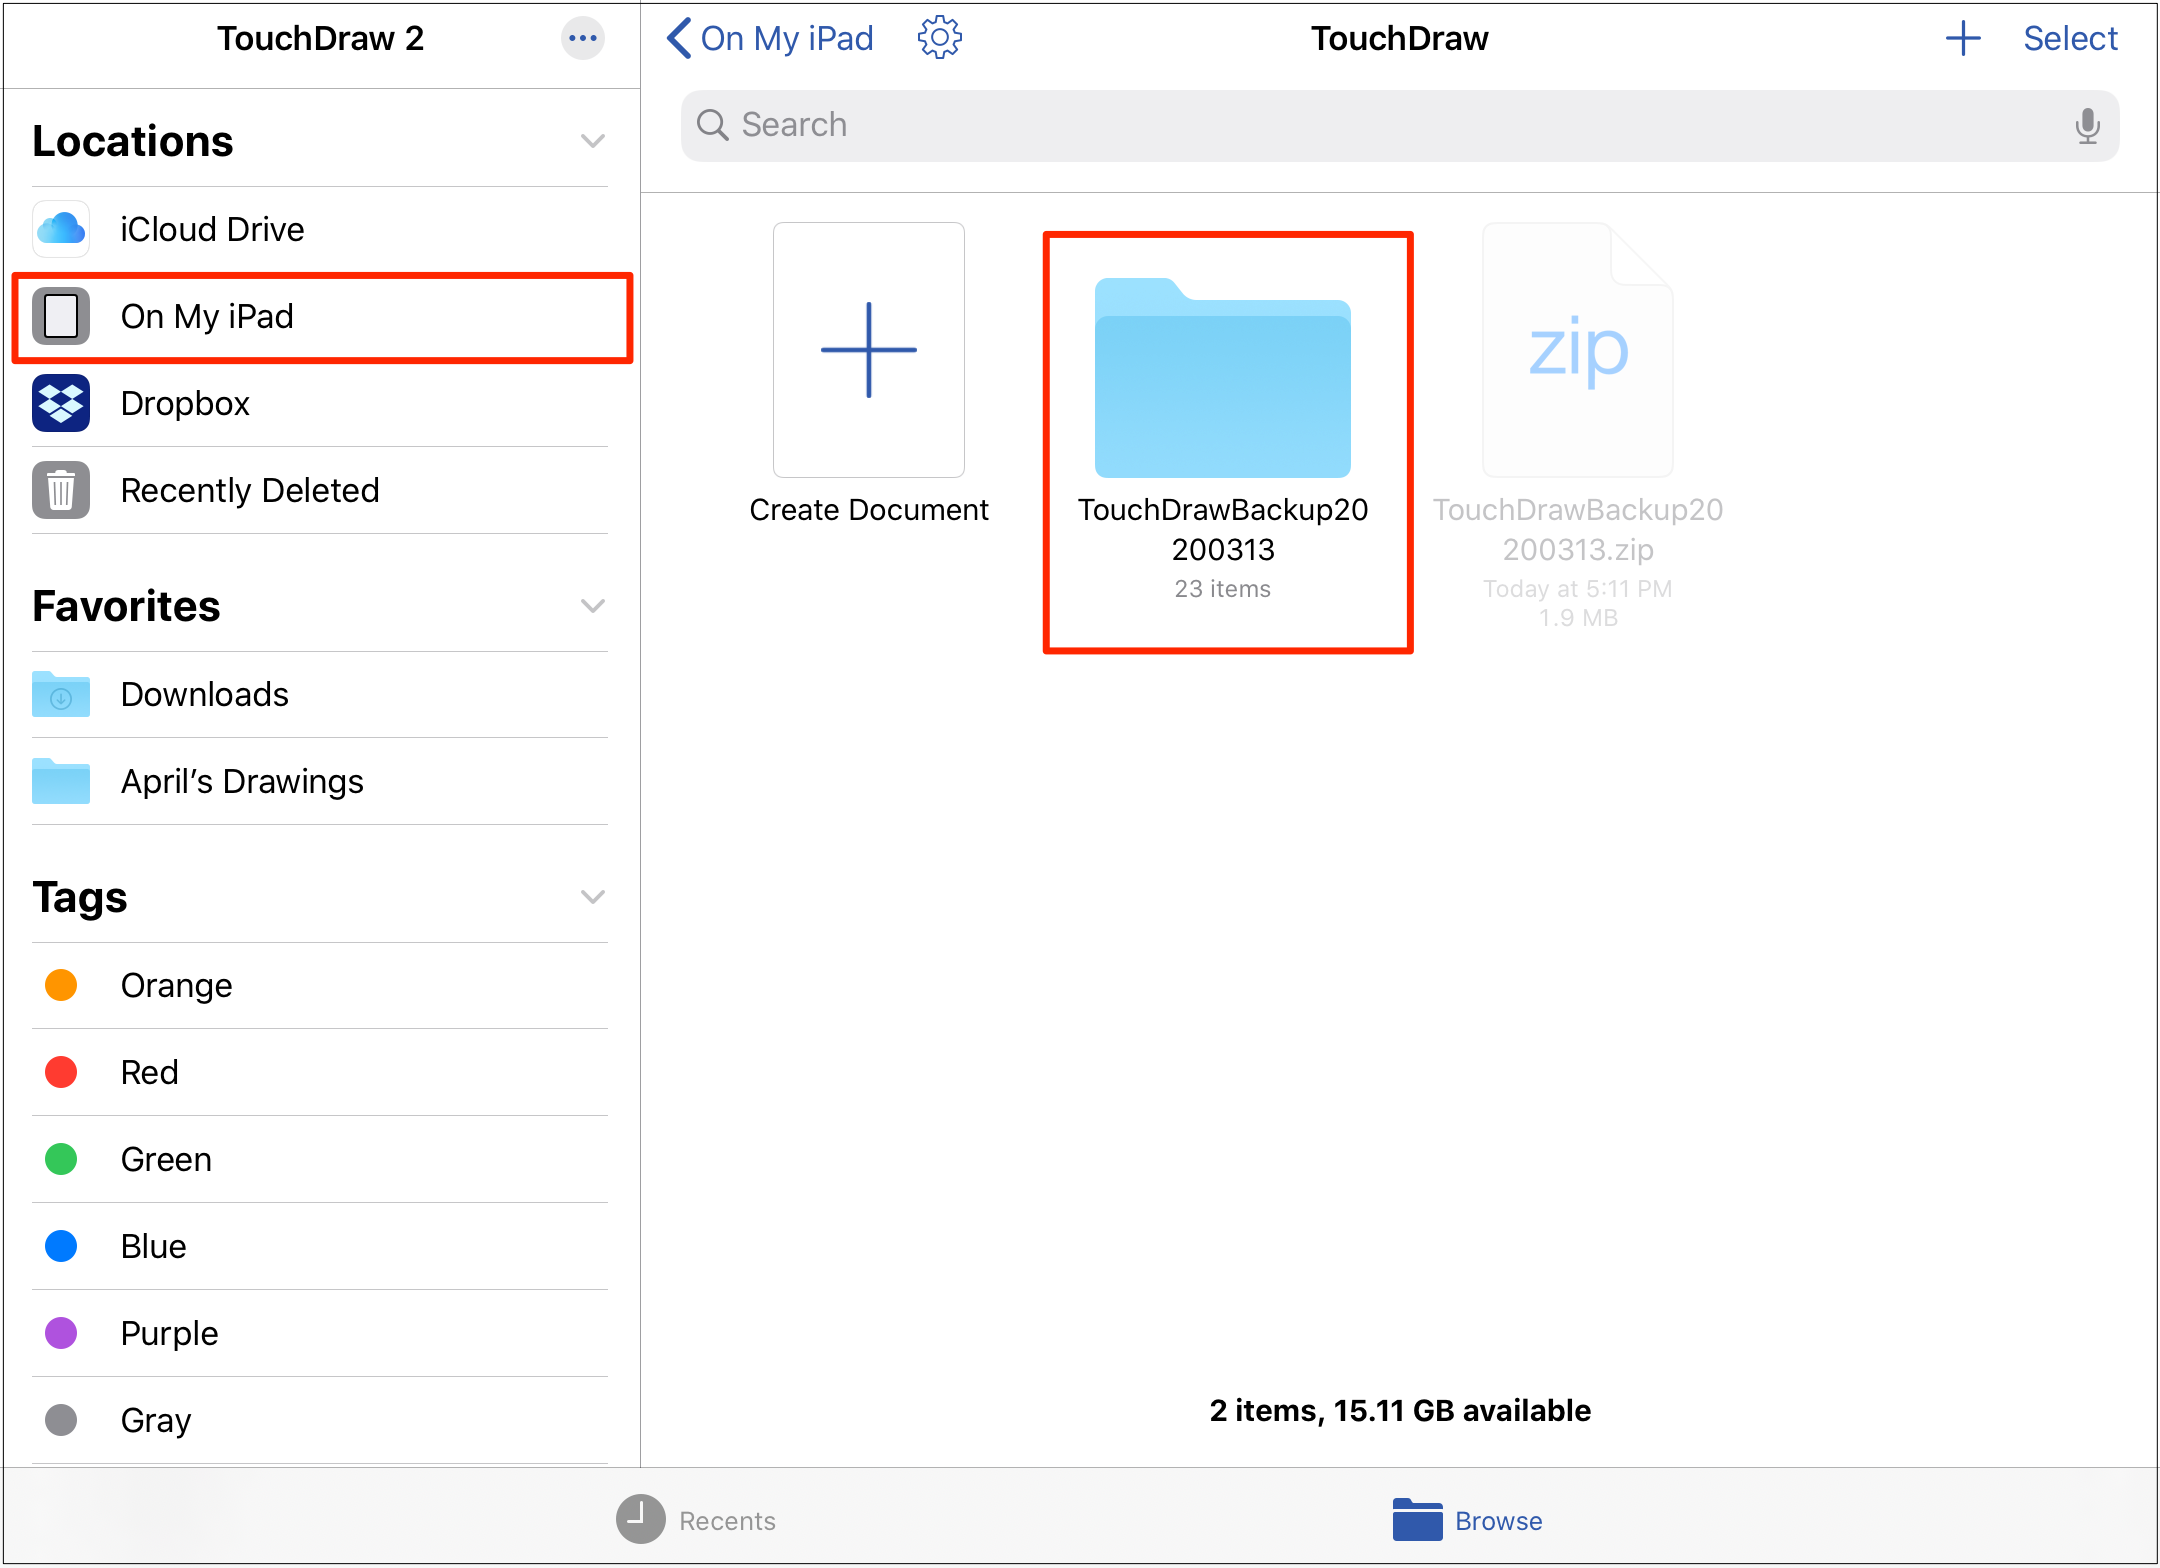
Step 8: Once the Zip file has been unzipped, a new folder will be present within the TouchDraw folder on your iPad. All drawings and libraries backed up from TouchDraw 1 will appear in this folder. The folder will have the same name as the created backup Zip file (i.e. TouchDrawBackup…), as shown below:
Note: The backup file will have numbers at the end that represent the Year/Month/Date that the file was created.
Step 9: This folder will be visible when viewing drawing documents within TouchDraw 2 on your iPad, as shown below:
Opening Your Drawings
To open an imported drawing from TouchDraw 1, simply tap on the drawing within the Document Picker.

Importing Custom Libraries
Libraries can be imported into TouchDraw 2 from the TouchDraw 1 backup file as well. Complete the following steps to do so:
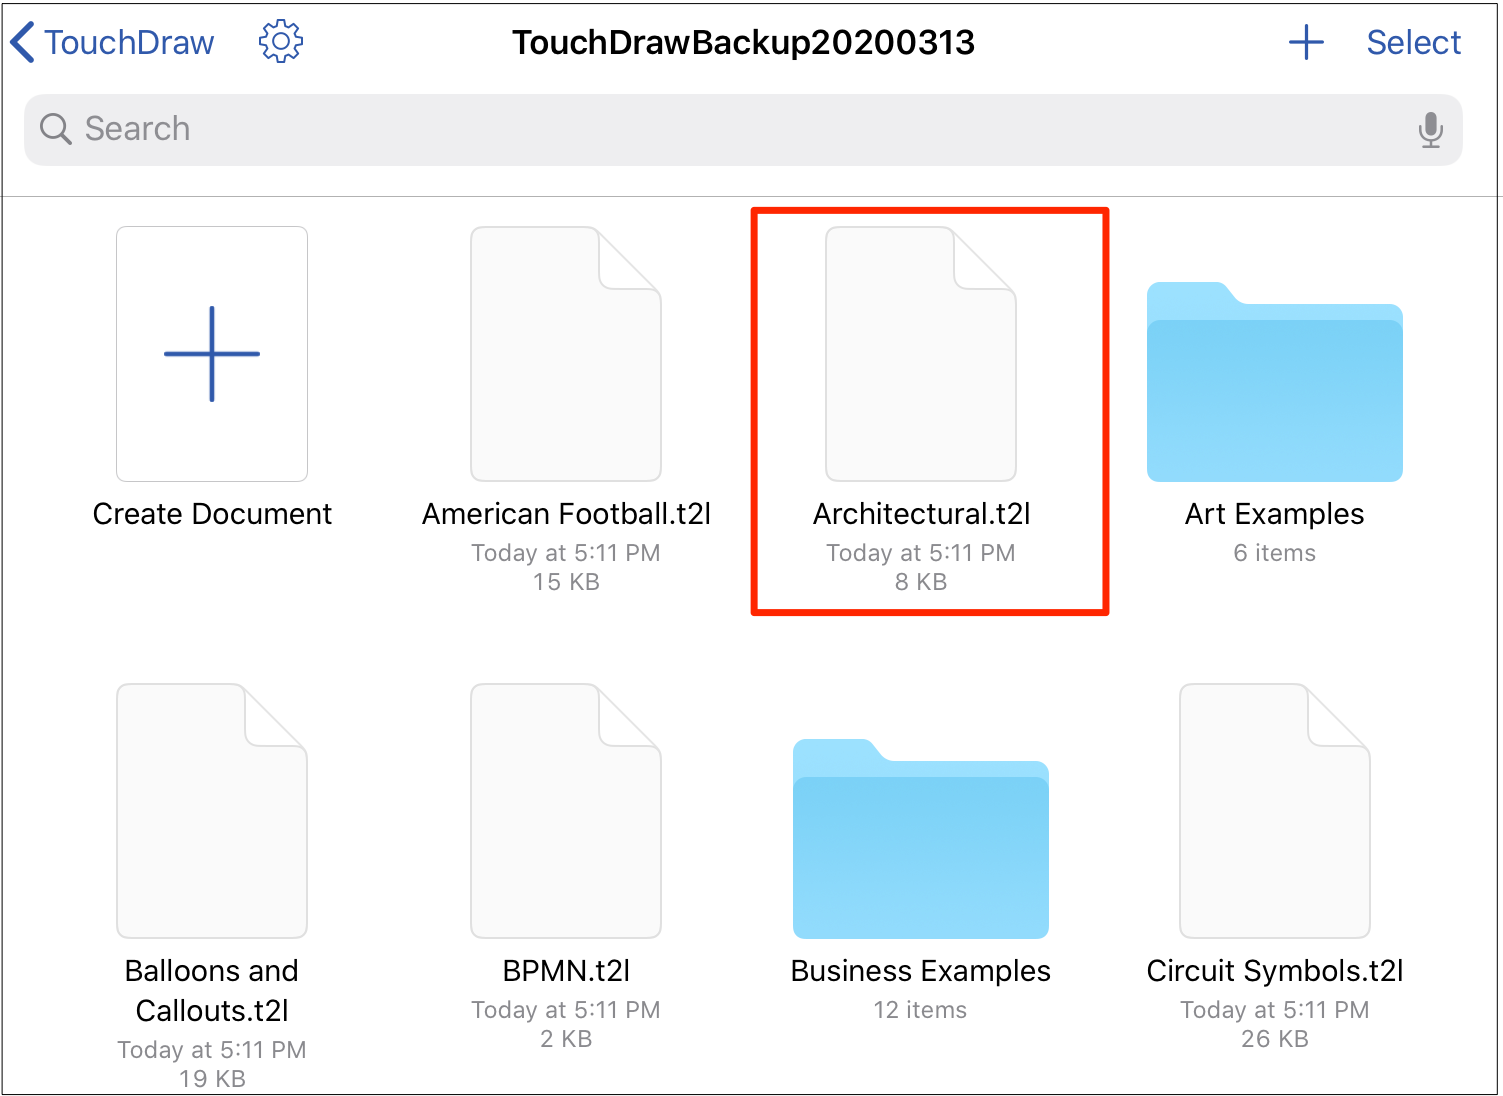
Step 1: To import any of your custom libraries into TouchDraw 2, tap on the library folder within the Document Picker.
Step 2: Tap on Import to import the selected library into TouchDraw 2. You may also tap on Cancel to close this message without completing the import.

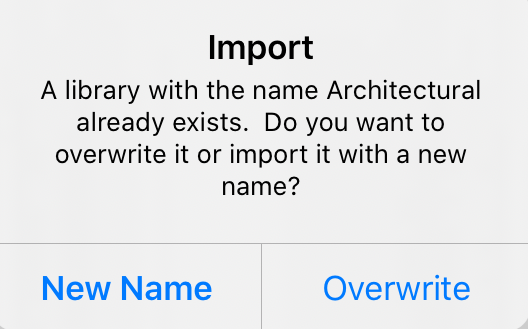
Step 3: If a library already exists in TouchDraw 2 with the same name, the following message will be provided. Tap on New Name to append a number to the end of the file and prevent an overwrite or tap on Overwrite to replace the current library with the imported one.
Step 4: In this example, a new name was given to the library file. Tap Dismiss to close the message.